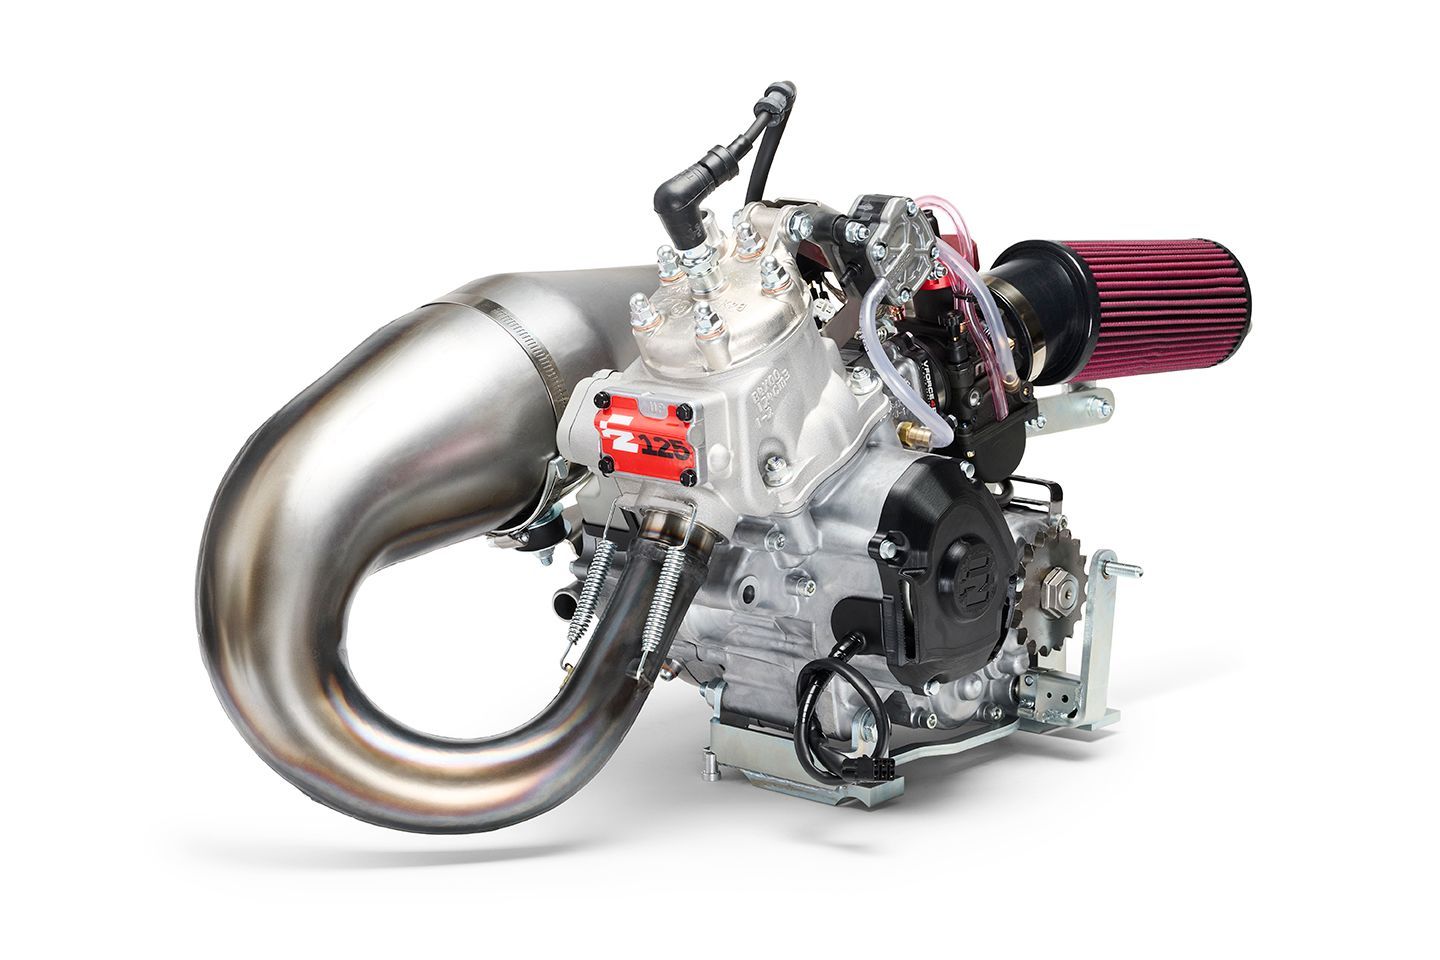
This quick guide will cover the basics of jetting your Nibbi PWK Carburetor for the FZ Shifter engine platform, as well as basic maintenance items to keep your engine tuned in its optimal performance window. The baseline jetting for normal running for the 28mm
PWK & 38mm PWK is as follows:
Carburetor
|
Engine
|
Pilot Jet |
Main Jet |
Needle Clip |
Air Screw |
Power Jet
28mm PWK | FZ65/85 | 45 | 120 | P5 | 1.0 | 1.0
38mm PWK FZ125 52 175 P5 | 1.5 | 1.0
These baseline settings will give you optimal engine performance for what we’ll call the ‘average’ racing conditions (roughly 1,500-3,000 ft on the density altitude). We suggest using a weather app or something similar to Air Density Online to keep track of the changes in air quality throughout the day.
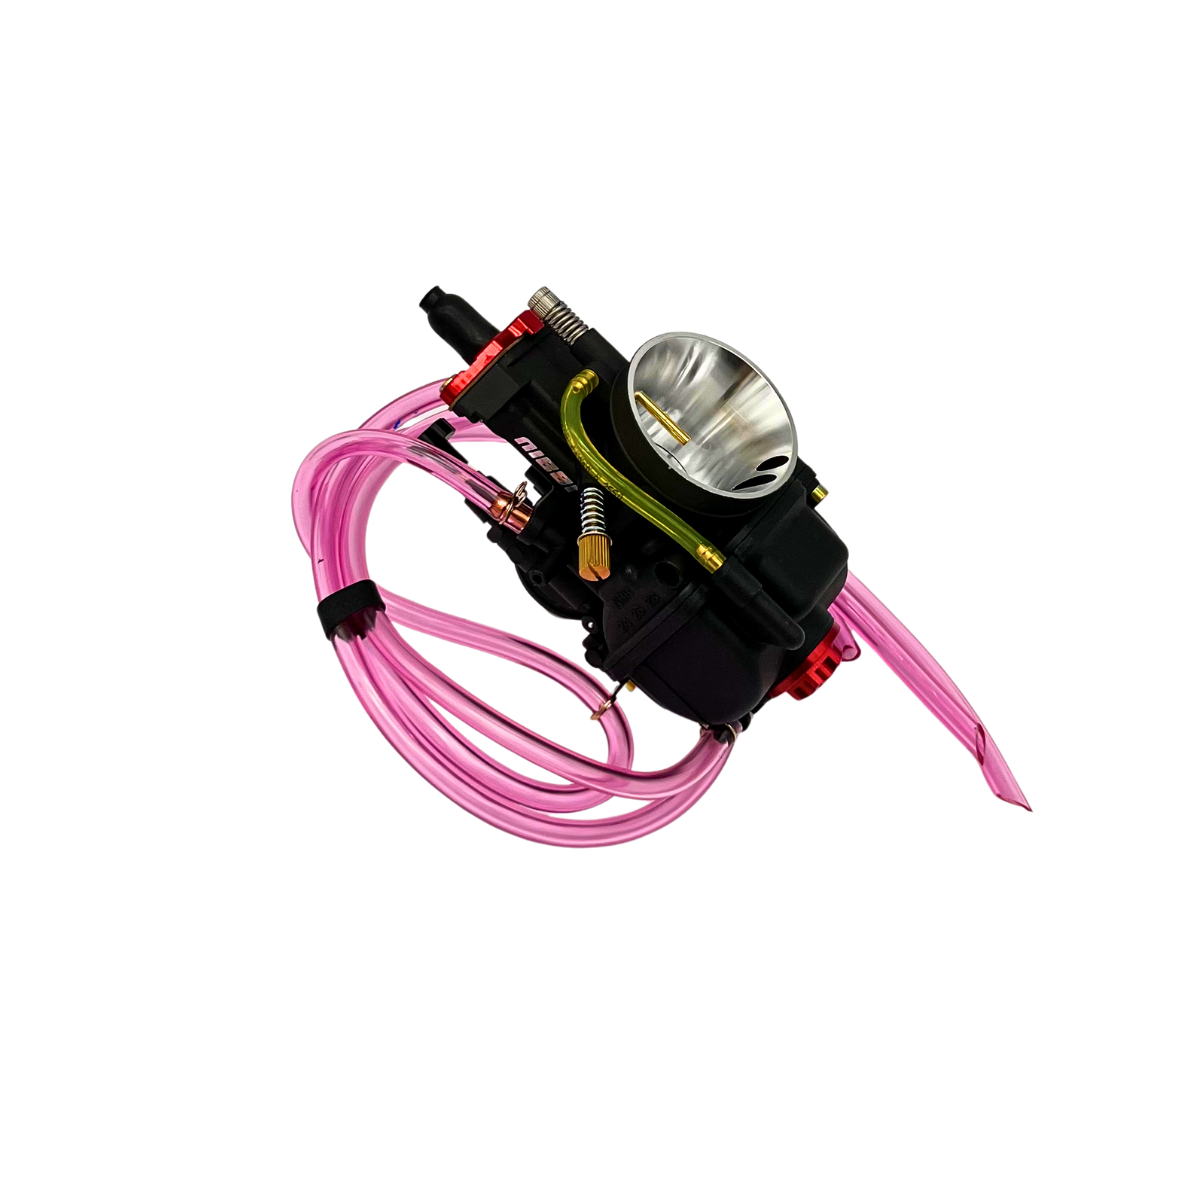
For those of you that are used to the Italian engines like KZ’s, the ease of jetting the FZ engines will come as a surprise; once the air density begins exceeding the 1,500-3,000 ft range, all you have to do is tune the carburetor with what is called a Power Jet. The Power Jet on the Nibbi PWK Carburetors is located directly on top, just behind the slide, and can be quickly adjusted with a flat blade screwdriver. What is a Power Jet? Well, a Power Jet is an invention in carburetion that’s been around a long time, but is just now starting to see more widespread use in the powersports industry. The technology is relatively simple; a 3rd fuel circuit is added by installing a fuel nozzle on the front side of the slide and connecting it to the float bowl in such a way that as the vacuum pressure builds (i.e. more RPM) fuel is added earlier in the intake process which then better atomizes the fuel for certain RPM ranges. Since shifter karting tends to have very narrow RPM windows (when compared to something like motocross), this allows us to fine tune the jetting to be as optimal as possible in that 8,000-13,000 rpm range.
We’ve found the best on-track and dyno performance to be with the Power Jet tuned between 0.5 – 1.5 turns out. What this means is that as the density altitude increases past 3,000 ft, you’ll end up doing most of your tuning just by simply turning in the Power Jet to slightly lean out the carburetion. We’ve found that for about every 500 ft in increased density altitude, you should turn in the power jet about 0.25 of a turn. Likewise, if you live in a colder climate where the morning air can dip below 1,500 ft, just simply open the power jet 0.25 of a turn for every 500 ft that the density altitude decreases.
Once the density altitude starts getting over 4,000 ft, this is where you’ll start having to adjust things like the Needle Clip Position, Pilot Jet, and sometimes even a main jet. To
be very clear, due to the way the FZ engines are set up and tuned (i.e. relatively low exhaust ports, relatively low compression, etc.) this means that the optimal performance window of the carburetion is very wide. For instance, on an FZ125 going from a 175 main jet to a 165 main jet is likely to be an increase in only 0.1-0.2hp (and most times not even quantifiable on the data on the track), and even then there’ll be a trade off where you’ll slightly gain some peak and over-rev, but lose out on a little bit of torque as you lean the jetting out. For this reason we recommend always trying to run a fuel mixture that’s on the ‘rich’ side, as the engine will lose much more power from trying to go too lean than they will from being just a little bit too rich. Running a slightly richer fuel mixture also keeps the rod bearings and piston/rings lasting even longer as well.
The main reason all that needs to be said, is that as the Air density exceeds that 4,000 ft range (or if you’re local track just has some weird characteristics like very tight, low rpm corners) what you’ll want to focus on is the main drivability and throttle response of the engine. This means you’ll be doing most of your fine tuning with the Air Screw, Pilot Jet, and Needle Clip Position, rather than just the main jet. The Air Screw is located on the side of the carburetor facing the seat (it’s the small brass screw tucked away that you adjust with a small flat blade screwdriver, NOT the larger screw on the side that has a spring under it – that’s the idle) and is the first thing you’ll start to open up once your driver starts noticing a small delay on initial throttle response. You can go out 0.25 turns at a time for a quick adjustment, until you get to 2.0 turns out. Once at 2.0 turns out, if there’s still a slight rich delay on throttle response, you can then start leaning out the pilot jet to a 50, and then to a 48 if needed. This should really only be necessary at tracks with tight infields / density altitude above 4,500 ft. As for the FZ65/85 with the 28mm PWK, you should be able to leave the 45 pilot in almost all conditions, and only when the density altitude begins to exceed 5,000 ft would you then just go from P5 on the Needle to P4.
At the end of the day, there isn’t a huge performance delta with the jetting when it comes to the actual horsepower; rather it’s more about the feel and consistency when driving the kart on track that will result in slightly better lap times.
Basic Maintenance
The most important maintenance item on the Nibbi PWK carburetors is simply to drain the fuel from the float bowl when you’re done driving at the end of the day. The easiest method is to remove the carburetor clamp, fuel line, and slide, and then tip the carburetor upside down to drain all the fuel out of it. The main advantages to doing this is so that the fuel/oil doesn’t sit in the jets and leave behind an oily residue on the needle/seat.
If you notice after driving a session that there seems to be fuel coming up from the carburetor vent lines, then that typically means that the needle/seat isn’t sealing properly. To fix this, remove the carburetor and then remove the float bowl at the bottom with the little 3mm screws. With the float bowl removed, pull the small pin that holds the floats in place, and then remove needle/seat and clean the rubber tip with some carb clean / Suspension clean and a microfiber towel. Clean the brass fitting that the needle/seat seals against as well, and then reassemble the carburetor and that should fix the issue.
The 2 recommended Spark Plugs are the NGK BR10EIX & the BR10EG. For the BR10EIX plugs, they come pre-gapped and are ready to install as-is. For the BR10EG plugs, you should gap the Spark Plugs to 0.035”. If you’re experiencing issues with the engine running, bogging, or cutting out, it’s always recommended to install a new spark plug to see if that fixes the issue first. If the issue continues, make sure the spark plug cap is installed correctly (unscrew the cap, re-cut the plug wire, then screw the cap back on), and that the spark plug cap clicks or connects securely to the top of the spark plug.
A few other basic troubleshooting tips are to keep an eye on the coil wires and ground wire, and make sure everything is connected properly. A few common mistakes are from people zip-tying the wiring harness too tight and it tugs on the coil wires.
GOOD LUCK!